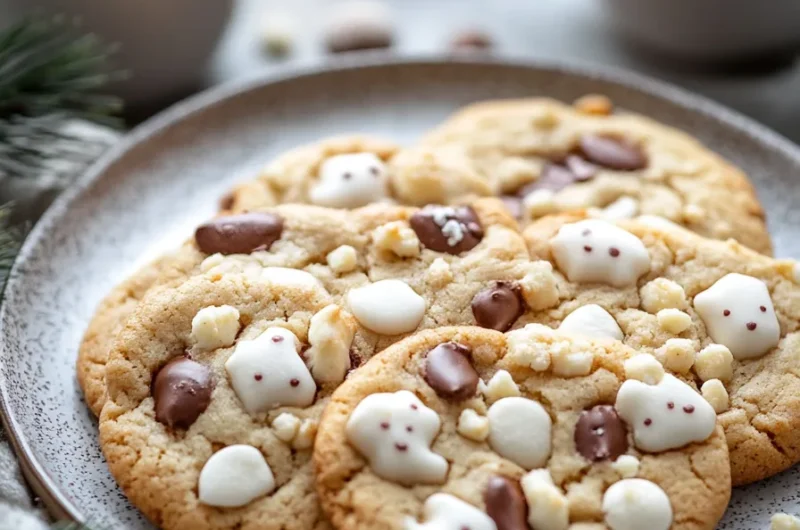
Polar Bear Cookies are an amazing holiday treat that brings joy and whimsy to any winter celebration. Picture these adorable cookies adorned with sweet frosting that resembles playful polar bears, perfect for family gatherings or festive parties. Baking can be a fun, creative outlet and these cookies capture that spirit wonderfully. The fun designs and delicious flavors are sure to please both kids and adults alike, making them a favorite during the winter months.
If you have ever wished to create a delightful snack that is both visually appealing and delicious, then Polar Bear Cookies are just the recipe you need. These cookies offer a unique twist on traditional holiday baked goods. They are not only a treat for your taste buds but also a feast for your eyes. Each delicious bite will transport you to a winter wonderland, leaving a smile on your face and warmth in your heart.
This guide will take you through the process of making these delightful cookies from start to finish. You will learn why this recipe is a must-try and how simple ingredients come together to create something truly extraordinary. Let’s journey into the amazing world of Polar Bear Cookies!
Why You’ll Love This Recipe
Polar Bear Cookies are not just another dessert; they are a delightful activity for all ages. Here’s why you’ll adore this recipe:
1. Fun and Creative – Decorating cookies like polar bears allows for artistic expression. Children love helping with the designs!
2. Perfect for the Holidays – These cookies are ideal for winter holidays, parties, or just a cozy evening at home.
3. Simple Ingredients – Most ingredients are kitchen staples, making preparation easy and convenient.
4. Great Gift Idea – Pack a few Polar Bear Cookies in a box to share with friends and family.
5. Endless Customization – You can customize your polar bears with different edible decorations.
6. Delicious Flavor – The combination of buttery cookie dough with sweet frosting creates a delightful flavor.
With these benefits, it’s clear why this recipe will steal the show at any gathering. Each cookie is not just a treat but a reason to celebrate togetherness and creativity!
Preparation and Cooking Time
Creating Polar Bear Cookies will take approximately one hour and thirty minutes. This includes preparation, baking, and decorating. Here’s how the time breaks down:
– Preparation Time: 30 minutes
– Cooking Time: 10-12 minutes
– Cooling Time: 15-20 minutes
– Decorating Time: 30 minutes
These times can vary a little based on your baking experience and kitchen setup, but this is a good estimate to follow.
Ingredients
– 2 ¾ cups all-purpose flour
– 1 teaspoon baking soda
– ½ teaspoon baking powder
– ½ teaspoon salt
– 1 cup unsalted butter, softened
– 1 ½ cups granulated sugar
– 1 teaspoon vanilla extract
– 1 large egg
– 2 cups powdered sugar (for frosting)
– 3 tablespoons milk (for frosting)
– Mini chocolate chips (for eyes and nose)
– Black or brown edible marker (for details)
– Piping bag or Ziplock bag (for frosting)
Step-by-Step Instructions
Making Polar Bear Cookies can be a delightful experience. Follow these simple steps to achieve incredible results:
1. Preheat Oven: Preheat your oven to 350°F (175°C) and line a baking sheet with parchment paper.
2. Mix Dry Ingredients: In a bowl, whisk together the flour, baking soda, baking powder, and salt until well combined.
3. Cream Butter and Sugar: In a separate bowl, beat the softened butter and granulated sugar until light and fluffy, about 3-4 minutes.
4. Add Egg and Vanilla: Mix in the vanilla extract and egg until fully incorporated.
5. Combine Mixtures: Gradually add the dry ingredients to the wet mixture, stirring until just combined and a dough forms.
6. Shape Cookies: Scoop dough using a tablespoon and shape it into rounds. Place them on the prepared baking sheet, leaving space between each cookie.
7. Bake: Bake in the preheated oven for 10-12 minutes or until the edges are lightly golden.
8. Cool: Remove from the oven and allow cookies to cool on the baking sheet for 5 minutes before transferring them to a wire rack to cool completely.
9. Prepare Frosting: In a mixing bowl, combine powdered sugar and milk to create a smooth frosting. Adjust consistency if needed.
10. Decorate: Use a piping bag or Ziplock bag to outline and fill the top of each cookie with frosting.
11. Add Features: While the frosting is still wet, add mini chocolate chips for eyes and nose. Use an edible marker for extra details if desired.
Each step brings you closer to creating these whimsical cookies! Enjoy the process, and feel free to get creative with your decorations.
How to Serve
When it comes to serving Polar Bear Cookies, consider the following to create a memorable experience:
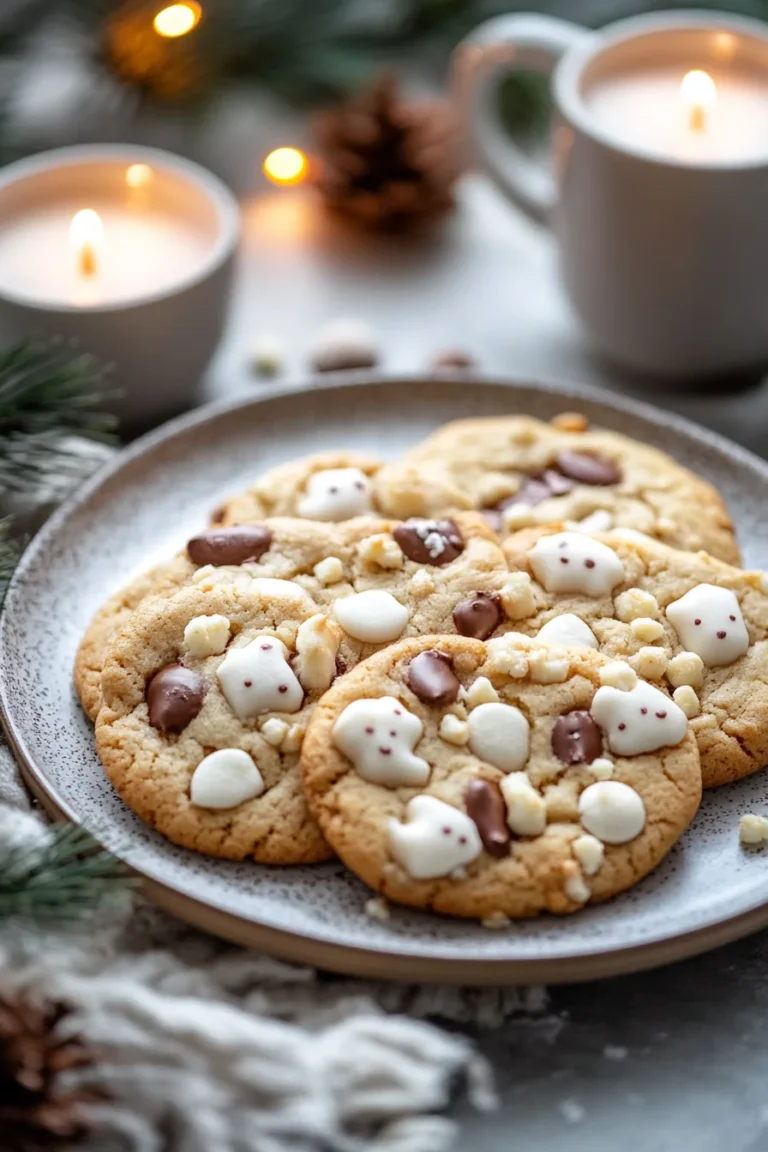
1. Presentation Matters: Arrange the cookies on a festive platter or cake stand to create a stunning centerpiece.
2. Pair with a Drink: Offer hot chocolate or a glass of milk to complement the sweetness of the cookies.
3. Gift-Worthy: These cookies make great gifts! Package them in decorative boxes or mason jars with cute ribbons.
4. Engage Guests: Encourage guests, especially kids, to join in decorating some cookies of their own for a fun activity.
5. Add a Fun Tag: Attach a festive tag with the cookie name and a fun message for an additional special touch.
By putting thought into how you serve Polar Bear Cookies, you create an enjoyable and cheerful atmosphere for everyone to share!
Additional Tips
– Use Fresh Ingredients: Always opt for fresh butter and high-quality vanilla extract to enhance the flavor of your Polar Bear Cookies.
– Chill the Dough: If you’re having difficulty shaping the cookies, chill the dough for 15-30 minutes. This makes it easier to handle.
– Use Piping Technique: For a more artistic approach, practice your piping technique on parchment paper before frosting the actual cookies.
– Explore Flavor Extracts: While vanilla is classic, consider adding almond or peppermint extract for a unique twist.
– Don’t Overbake: Keep an eye on the cookies as they bake. Remove them from the oven when they’re just lightly golden for the best texture.
Recipe Variation
Enhance your baking adventure with these fun variations:
1. Chocolate Polar Bears: Add cocoa powder to the cookie dough for a rich chocolate flavor.
2. Sprinkle Toppers: Use colorful sprinkles or edible glitter on the frosting for a festive touch.
3. Fruity Twist: Incorporate lemon or orange zest into the dough for a refreshing citrus flavor.
4. Gluten-Free Option: Substitute all-purpose flour with a gluten-free flour blend for gluten-sensitive friends.
5. Nutty Penguins: Add finely chopped nuts to the dough for a delightful crunch in each cookie.
Freezing and Storage
– Storage: Place the cookies in an airtight container at room temperature. They can last for up to a week.
– Freezing: You can freeze the cookies either frosted or unfrosted. Lay them on a baking sheet, freeze until solid, then transfer to a freezer bag. They can last up to three months. To thaw, simply leave at room temperature or pop them in the microwave for a few seconds.
Special Equipment
To create your Polar Bear Cookies, you will need:
– Mixing bowls for your ingredients
– Electric mixer for creaming butter and sugar
– Measuring cups and spoons for accurate ingredient amounts
– Parchment paper to line your baking sheets
– Piping bags or Ziplock bags for decorating
– Baking sheets for cookies
Frequently Asked Questions
How can I achieve a smooth frosting?
Mix the powdered sugar and milk until fully combined. Adjust the milk for desired consistency.
Can I make these cookies ahead of time?
Yes, you can prepare cookie dough and refrigerate it for up to three days before baking.
What can I use instead of mini chocolate chips for eyes?
You can use candy eyes or even small pieces of fruit like raisins for a different look.
Can I decorate the cookies with royal icing?
Absolutely! Royal icing can provide a more defined and intricate decoration.
Are there alternatives to butter for a dairy-free version?
You can substitute unsalted butter with coconut oil or dairy-free margarine.
Conclusion
Polar Bear Cookies are more than just a festive treat; they symbolize creativity and connection. Through the joy of baking, you can create delightful memories with family and friends during the winter season. These cookies, with their creative designs and delicious flavors, are sure to become a staple in your holiday traditions. With just some simple steps and ingredients, you can whip up these charming cookies and bring a taste of winter wonderland into your kitchen.
Polar Bear Cookies: An Incredible Ultimate Recipe for Winter Fun
- Total Time: 26 minute
Ingredients
– 2 ¾ cups all-purpose flour
– 1 teaspoon baking soda
– ½ teaspoon baking powder
– ½ teaspoon salt
– 1 cup unsalted butter, softened
– 1 ½ cups granulated sugar
– 1 teaspoon vanilla extract
– 1 large egg
– 2 cups powdered sugar (for frosting)
– 3 tablespoons milk (for frosting)
– Mini chocolate chips (for eyes and nose)
– Black or brown edible marker (for details)
– Piping bag or Ziplock bag (for frosting)
Instructions
Making Polar Bear Cookies can be a delightful experience. Follow these simple steps to achieve incredible results:
1. Preheat Oven: Preheat your oven to 350°F (175°C) and line a baking sheet with parchment paper.
2. Mix Dry Ingredients: In a bowl, whisk together the flour, baking soda, baking powder, and salt until well combined.
3. Cream Butter and Sugar: In a separate bowl, beat the softened butter and granulated sugar until light and fluffy, about 3-4 minutes.
4. Add Egg and Vanilla: Mix in the vanilla extract and egg until fully incorporated.
5. Combine Mixtures: Gradually add the dry ingredients to the wet mixture, stirring until just combined and a dough forms.
6. Shape Cookies: Scoop dough using a tablespoon and shape it into rounds. Place them on the prepared baking sheet, leaving space between each cookie.
7. Bake: Bake in the preheated oven for 10-12 minutes or until the edges are lightly golden.
8. Cool: Remove from the oven and allow cookies to cool on the baking sheet for 5 minutes before transferring them to a wire rack to cool completely.
9. Prepare Frosting: In a mixing bowl, combine powdered sugar and milk to create a smooth frosting. Adjust consistency if needed.
10. Decorate: Use a piping bag or Ziplock bag to outline and fill the top of each cookie with frosting.
11. Add Features: While the frosting is still wet, add mini chocolate chips for eyes and nose. Use an edible marker for extra details if desired.
Each step brings you closer to creating these whimsical cookies! Enjoy the process, and feel free to get creative with your decorations.
- Prep Time: 15 minutes
- Cook Time: 10-12 minutes
Nutrition
- Serving Size: 24 cookies
- Calories: 120 kcal (per cookie)
- Fat: 6g
- Protein: 1g